
Tying a tie is a rite of passage into professional adulthood. Yet, many still struggle with it—especially when time is short and a mirror isn’t available. Whether you're rushing to a job interview, an early meeting, or a last-minute event, knowing how to tie a tie confidently and correctly—without relying on visual feedback—is a valuable skill. The good news: it’s entirely possible, and even fast, once you understand the mechanics and practice the right method.
This guide focuses on the most practical, widely applicable knot—the four-in-hand—and teaches you how to tie it flawlessly by feel, muscle memory, and positioning. No mirrors, no guesswork. Just results.
The Four-in-Hand: Why It’s Ideal for Mirrorless Tying
The four-in-hand knot is the most common tie knot for good reason. It’s simple, asymmetrical, and narrow enough to fit neatly under most collar styles. More importantly, its sequence of movements is repetitive and tactile, making it perfect for learning by touch rather than sight.
Unlike more complex knots like the Windsor or half-Windsor, which require precise manipulation and symmetry checks, the four-in-hand follows a linear pattern that can be broken down into distinct physical cues. Once memorized, each motion becomes automatic, allowing you to tie your tie blindfolded—if needed.
“The four-in-hand is the workhorse of tie knots. Its simplicity makes it ideal for high-pressure situations where precision and speed matter.” — Daniel Hart, Menswear Stylist & GQ Contributor
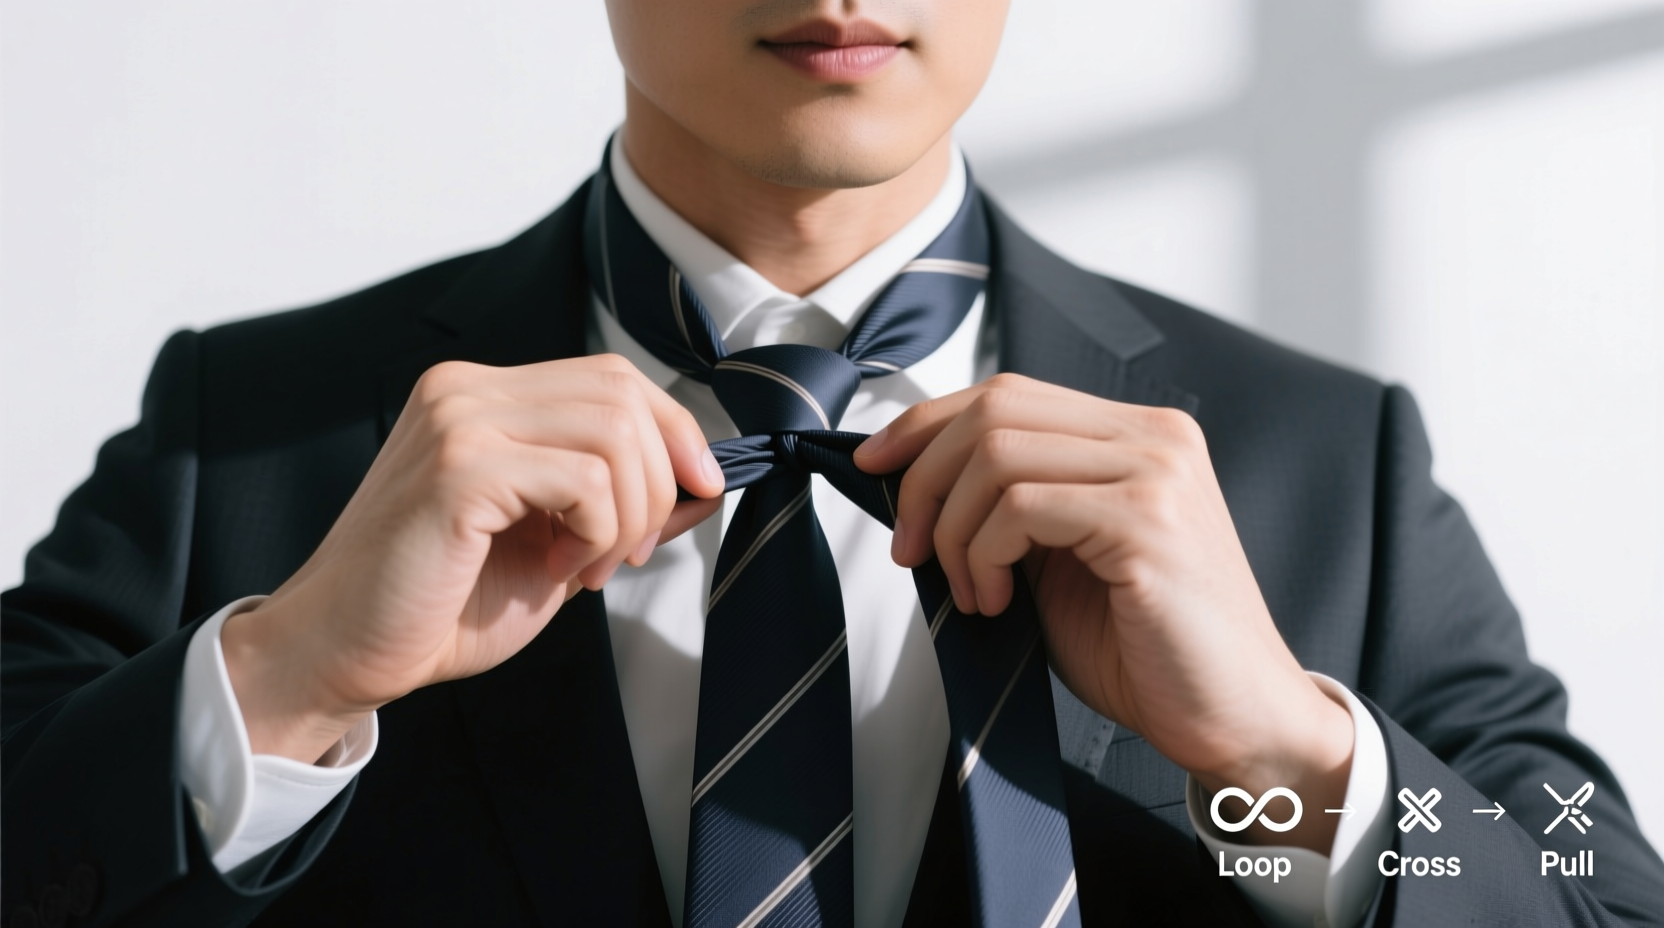
Step-by-Step Guide: Tying a Tie Without a Mirror
Follow this detailed sequence to master the four-in-hand knot using only your hands and spatial awareness. Practice slowly at first, then build speed through repetition.
- Start with proper positioning: Drape the tie around your neck with the wide end on your right side, hanging about 12 inches (30 cm) lower than the narrow end. This starting length ensures the wide end will reach the correct final position after tying.
- Cross the wide end over the narrow end: Bring the wide end horizontally across the front of the narrow end, forming an “X” just below your chin. Use your dominant hand to guide it. You should feel the smooth slide of fabric crossing leftward.
- Loop the wide end behind the narrow end: Take the wide end and pass it directly behind the narrow end, from right to left. Your fingers should sense the shift from outer layer to inner loop. At this point, both ends are temporarily reversed in front-back order.
- Bring the wide end up through the neck loop: Reach up with your dominant hand, locate the loop around your neck (the space between your collar and the tie), and pull the wide end upward through it. You’ll feel resistance as the fabric tightens slightly—this is normal.
- Guide the wide end down through the front loop: After pulling it up, immediately guide the wide end back down through the horizontal loop now formed in front of your chest. This is the key tightening step. You should feel the knot begin to form against your collarbone.
- Adjust and tighten by feel: Hold the base of the knot gently with one hand while pulling the narrow end downward with the other. Simultaneously, slide the knot upward with your holding hand until it rests snugly under your collar. The dimple just above the knot should form naturally as you apply gentle tension.
Building Confidence Through Muscle Memory
The secret to tying a tie without a mirror isn’t innate talent—it’s repetition. Your hands learn sequences just like your tongue learns to pronounce words. At first, every movement is deliberate. Over time, they become instinctive.
To accelerate this process, dedicate five minutes each morning to tying your tie with your eyes closed—even if you’re not late. Perform the steps slowly, focusing on the sensation of each motion: the cross, the wrap, the pull-through, the final tuck. Within a week of consistent practice, you’ll notice significant improvement.
Many professionals, including airline pilots, emergency responders, and broadcast journalists, rely on this technique daily. They don’t have the luxury of mirrors during quick changes, so they train their bodies to perform under pressure.
Mini Case Study: The Morning Commute Fix
James, a financial analyst in Chicago, used to leave home 20 minutes early just to tie his tie at the office bathroom mirror. One Tuesday, he spilled coffee on his shirt and had to change in the back of an Uber. With no mirror and only three minutes before his client meeting, he tried tying his tie by feel—using a video he’d watched weeks earlier. It wasn’t perfect, but it held. He arrived on time, confident, and closed the deal.
That night, he practiced the four-in-hand knot blindfolded for ten minutes. Within a week, he could tie it faster without a mirror than he ever could with one. Now, he ties his tie while walking from the elevator to his desk—never stopping, never checking.
Common Mistakes and How to Avoid Them
Even with the right technique, small errors can derail your progress. Here are the most frequent issues people encounter when learning to tie a tie without visual feedback—and how to fix them.
| Mistake | Why It Happens | Solution |
|---|---|---|
| Knot ends up too loose or crooked | Inconsistent tension during the final pull | Hold the knot base firmly while pulling the narrow end straight down—not sideways. |
| Wide end comes out too short or too long | Incorrect starting length | Begin with the wide end 10–14 inches below the narrow end. Adjust based on your height and tie length. |
| Fabric twists or wrinkles during the process | Twisting the tie instead of keeping it flat | Keep the tie flat against your chest throughout. Rotate your wrist, not the fabric. |
| Can't find the neck loop during Step 4 | Hands lose spatial orientation | Use your non-dominant hand to maintain contact with the knot area throughout. |
Pro Tips for Speed and Reliability
- Know your body, not just the knot: Everyone’s torso length, arm span, and tie preference differ. Customize your starting position. Tall individuals may need to start with the wide end longer; shorter frames may need less.
- Use textured ties for better feedback: Silk ties with subtle grain or weave provide more tactile information than perfectly smooth ones. This helps you detect alignment and tension.
- Pre-measure your tie: On a slow day, tie your tie normally and mark the ideal starting point on the back of the wide end with a discreet dot of fabric-safe pen. This gives you a reference for future blind ties.
- Practice under real conditions: Don’t just practice at home in calm lighting. Try it in dim light, while standing on one foot, or after putting on a jacket. Simulate real-world constraints.
Checklist: Mastering the Mirrorless Tie-Tie
Use this checklist to track your progress and ensure you’ve covered all critical aspects:
- ✅ Choose the four-in-hand knot as your default
- ✅ Learn the six-step sequence by performing it slowly in front of a mirror
- ✅ Repeat the process with eyes closed or blindfolded (5 times minimum)
- ✅ Focus on tactile cues: crossings, loops, and fabric tension
- ✅ Adjust starting length based on your body and tie
- ✅ Practice daily for one week without fail
- ✅ Test yourself in low-light or rushed scenarios
- ✅ Confirm final knot sits snugly under collar with a natural dimple
FAQ: Common Questions About Mirrorless Tie-Tying
Can I use this method with any type of tie?
Yes, the four-in-hand works with silk, wool, polyester, knit, and grenadine ties. Thicker materials may require slightly looser tension, but the sequence remains the same.
What if I make a mistake and can’t see it?
Stop and feel the knot. If it’s lopsided or loose, untie completely and restart. It’s faster to redo it than to adjust a flawed knot. With practice, errors become rare.
How long does it take to master this skill?
Most people achieve reliable results within 5 to 7 days of daily practice. Some master it in a single session. Consistency matters more than duration.
Final Thoughts: Confidence Starts Before the Mirror
Knowing how to tie a tie without a mirror isn’t just about convenience—it’s about autonomy. It means you’re prepared for anything: a sudden promotion speech, a surprise photo, a power outage before a Zoom call. It reflects a level of self-reliance that others notice, even if they don’t know why.
The ability to perform a polished task without external tools separates those who merely dress professionally from those who embody professionalism. When you can tie your tie blindfolded, you’re not just wearing a suit—you’re commanding it.


 浙公网安备
33010002000092号
浙公网安备
33010002000092号 浙B2-20120091-4
Comments
No comments yet. Why don't you start the discussion?