
Roof sheathing is the foundational layer that sits directly on top of your roof trusses or rafters, forming a solid base for shingles, metal panels, or other roofing materials. It plays a critical role in structural integrity, weather resistance, and overall durability. A poorly installed sheathing system can lead to sagging roofs, water infiltration, and premature failure of the entire roofing assembly. This comprehensive guide walks you through every phase of proper roof sheathing installation—ensuring strength, longevity, and peace of mind.
Selecting the Right Sheathing Material
The first decision in any sheathing project is choosing the appropriate material. The most common options are plywood and oriented strand board (OSB). Both meet building code requirements when used correctly, but they have distinct advantages and limitations.
| Material | Thickness Options | Pros | Cons |
|---|---|---|---|
| Plywood | 3/8\", 1/2\", 5/8\" | Resists swelling, holds fasteners well, better moisture recovery | More expensive, less uniform surface |
| OSB | 7/16\", 1/2\", 23/32\" | Cost-effective, consistent quality, strong shear resistance | Swells when wet, slower drying time, edge swelling risk |
For most residential applications, 1/2-inch or 5/8-inch thickness is standard. Thicker sheathing provides added rigidity, especially important for wide rafter spacing or high-wind zones. Always verify local building codes and manufacturer recommendations before making a final choice.
Pre-Installation Planning and Safety Measures
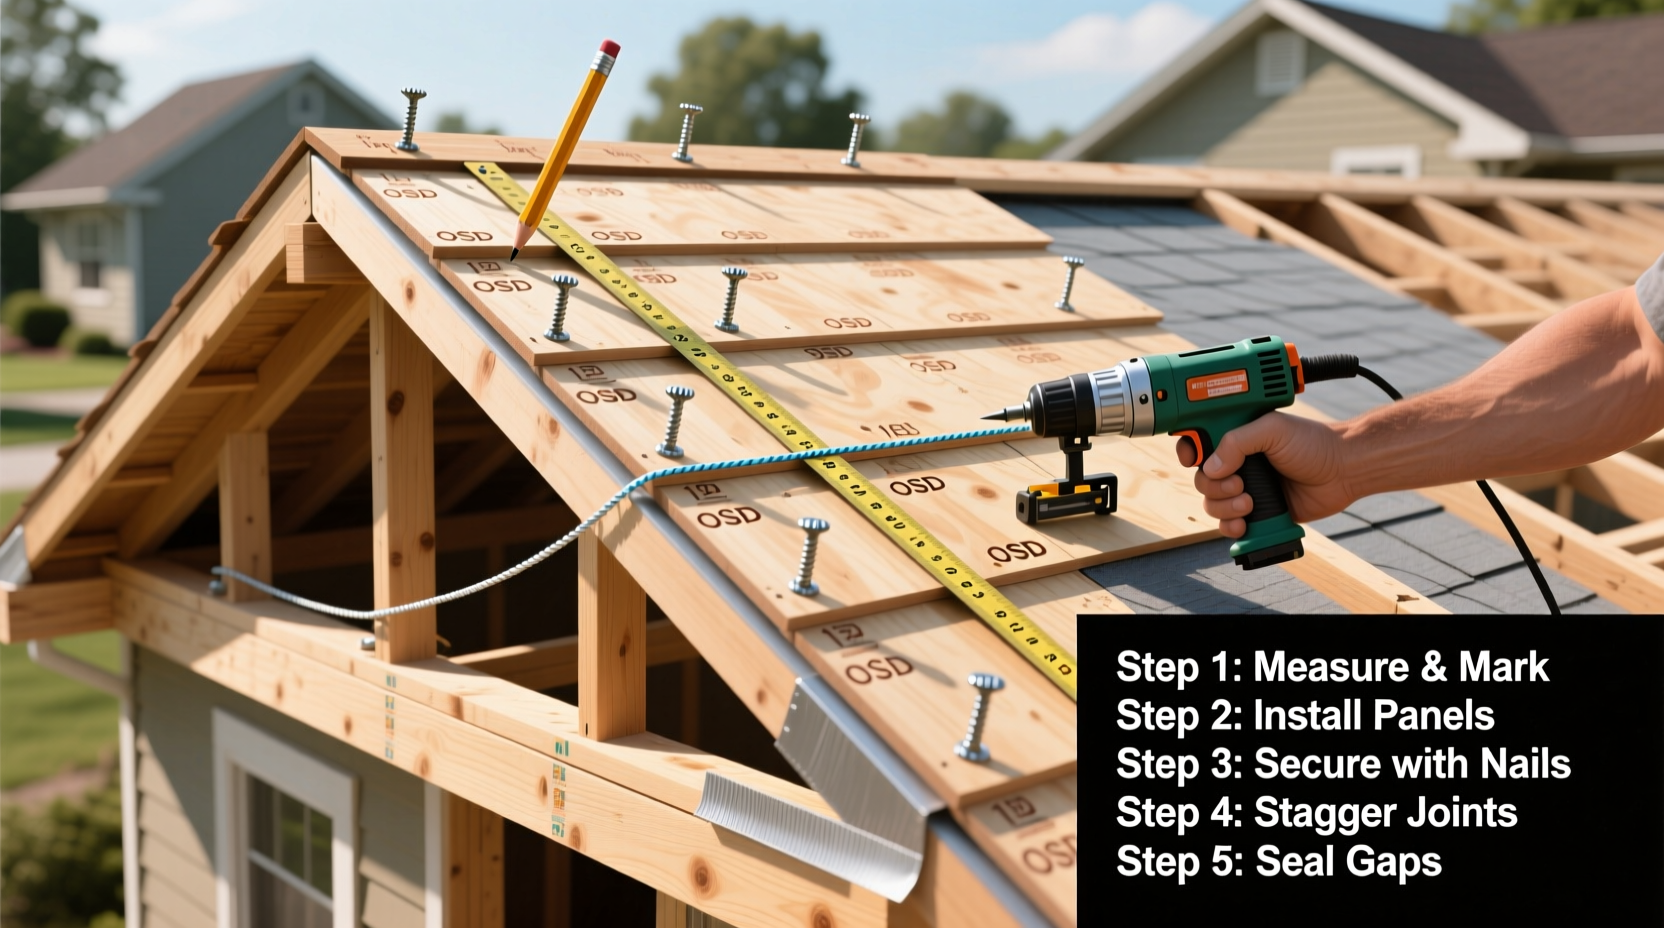
Before stepping onto the roof, thorough preparation ensures efficiency and safety. Begin with a detailed layout plan based on panel dimensions (typically 4' x 8'). Orient panels perpendicular to rafters or trusses, starting at the eaves and working upward. Stagger vertical joints so that adjacent rows don’t align—this prevents weak seams.
Safety is non-negotiable. Working at height requires:
- A secure ladder with stabilizer arms
- Proper scaffolding or toe boards if required
- Non-slip footwear and fall protection harnesses anchored to structurally sound points
- Clear communication with ground crew when lifting materials
Inspect all rafters for damage, warping, or rot before sheathing begins. Replace compromised members immediately. Confirm rafter spacing matches sheathing span ratings—usually 16” or 24” on center. Use a chalk line to mark alignment guides across rafters for consistent panel placement.
“A roof is only as strong as its weakest connection. Proper nailing patterns and correct fastener selection are just as important as the sheathing material itself.” — James Holloway, Master Carpenter & Roofing Consultant
Step-by-Step Installation Process
Follow this logical sequence to install roof sheathing efficiently and to code standards.
- Start at the Eave Edge: Position the first full sheet flush with the outer edge of the fascia board. Leave a 1/8-inch gap between sheets to allow for expansion, particularly with OSB.
- Align Panels Perpendicular to Rafters: Run panels across the slope, ensuring each spans at least three rafters unless otherwise rated.
- Fasten Securely: Use corrosion-resistant nails or screws designed for roof sheathing. Common choices include 8d common nails (2.5 inches) or #9 ring-shank screws. Nail spacing should be 6 inches on edges and 12 inches in the field, following IRC (International Residential Code) guidelines.
- Stagger Vertical Joints: Offset end joints by one full panel length in adjacent rows to prevent continuous seams.
- Maintain Gaps Around Penetrations: Leave space around chimneys, vents, and skylights for flashing later. Do not bridge valleys with solid sheathing—install V-notched panels or leave open per design.
- Install Hips and Ridges Last: Cut panels to fit along hip ridges using a circular saw or jigsaw. Avoid overhangs beyond the ridge cap area.
- Seal Seams (Optional but Recommended): In high-wind or heavy-rain climates, apply tape or sealant over horizontal joints beneath underlayment for extra protection.
Common Mistakes and How to Avoid Them
Even experienced builders occasionally make errors that compromise performance. Awareness helps prevent these costly oversights.
- Incorrect Fastening: Using too few nails or placing them too close to edges leads to nail-pull and panel lifting. Stick strictly to code-specified patterns.
- No Expansion Gaps: Failing to leave gaps between panels invites buckling due to moisture absorption.
- Blocking Ventilation Paths: Never let sheathing obstruct soffit vents or ridge airflow. Maintain clear pathways for attic ventilation.
- Improper Overhangs: Excessive sheathing beyond the rake or eave edge without support can crack under load. Limit overhangs to 3/4 inch unless reinforced.
- Rushing in Wet Conditions: Installing sheathing while wet traps moisture, leading to mold and degradation. Wait for dry weather whenever possible.
Final Inspection and Next Steps
Once all panels are secured, conduct a walk-through inspection. Look for:
- Secure fasteners with no missed nails
- Uniform gaps between panels
- No protruding screw heads or nail tips
- Clear access to vent areas
- Proper cutouts around roof features
After passing inspection, the next step is applying underlayment—a waterproof or water-resistant barrier that protects sheathing until final roofing is installed. Synthetic underlayments offer superior tear resistance and UV stability compared to traditional felt paper.
Checklist: Roof Sheathing Installation Completion
- ☐ All panels securely fastened with proper spacing
- ☐ Expansion gaps maintained between sheets
- ☐ No damaged or warped panels installed
- ☐ Ventilation paths preserved
- ☐ Edges aligned with eaves and rakes
- ☐ Worksite cleaned of debris and scrap
- ☐ Underlayment ready for immediate application
Frequently Asked Questions
Can I mix plywood and OSB on the same roof?
While technically possible, it’s not recommended. Different expansion rates and moisture responses can create uneven surfaces and complicate future repairs. Stick to one type across a single roof plane.
How long can roof sheathing remain exposed before underlayment is applied?
Ideally, underlayment should follow within 24–48 hours. Prolonged exposure—even to light rain—can cause OSB to swell or degrade. If delays are expected, cover the roof with temporary construction-grade plastic.
Do I need to glue roof sheathing in addition to nailing?
In standard installations, adhesive isn’t required. However, in high-wind regions (e.g., hurricane-prone areas), structural sheathing adhesive applied in beads along supports can enhance uplift resistance and reduce noise from thermal movement.
Conclusion
Installing roof sheathing properly is an investment in your home’s long-term resilience. By selecting the right materials, adhering to structural codes, and executing each step with precision, you create a foundation capable of withstanding decades of weather extremes. Whether you're a seasoned contractor or a dedicated DIYer, attention to detail makes all the difference. Take your time, double-check your work, and prioritize safety throughout the process.


 浙公网安备
33010002000092号
浙公网安备
33010002000092号 浙B2-20120091-4
Comments
No comments yet. Why don't you start the discussion?