
A foundation is only as strong as its footing. Footings distribute the weight of a structure into the soil, preventing uneven settling, cracking, and long-term structural failure. Whether you're building a deck, garage, or full-scale home, properly constructed footings are non-negotiable. This guide walks through every critical phase—from planning to curing—with field-tested methods that ensure durability and code compliance.
Understanding Footings and Their Role in Stability
Footings are concrete pads placed below frost level that support foundation walls, piers, or columns. They spread concentrated loads over a broader area of soil, reducing pressure and minimizing settlement. The type and depth depend on local building codes, soil conditions, and the structure’s load requirements.
There are several types of footings:
- Spread footings: Most common; used under walls and columns.
- Stepped footings: Used on sloped terrain to maintain consistent depth.
- Pier footings: Isolated pads supporting posts or beams.
- Continuous footings: Run beneath entire perimeter walls.
Choosing the right type begins with understanding your site's soil bearing capacity. Sandy soils typically support 2,000–3,000 psf (pounds per square foot), while clay may only handle 1,500 psf. A soils engineer can provide precise data if required.
“Over 70% of foundation failures stem from inadequate footings or poor drainage.” — National Association of Home Builders (NAHB)
Planning and Site Preparation
Before any digging begins, accurate planning prevents costly errors. Start with these steps:
- Review local building codes for minimum depth, width, and reinforcement requirements.
- Obtain necessary permits—most jurisdictions require inspections after excavation and before pouring.
- Mark layout using batter boards and string lines to ensure straight, square alignment.
- Call 811 to locate underground utilities before excavating.
Excavation must extend below the frost line to prevent heaving. In northern climates, this can be 48 inches deep; in milder zones, 12–24 inches may suffice. Always consult regional guidelines.
Step-by-Step Guide to Constructing Strong Footings
Follow this sequence to build reliable, load-bearing footings:
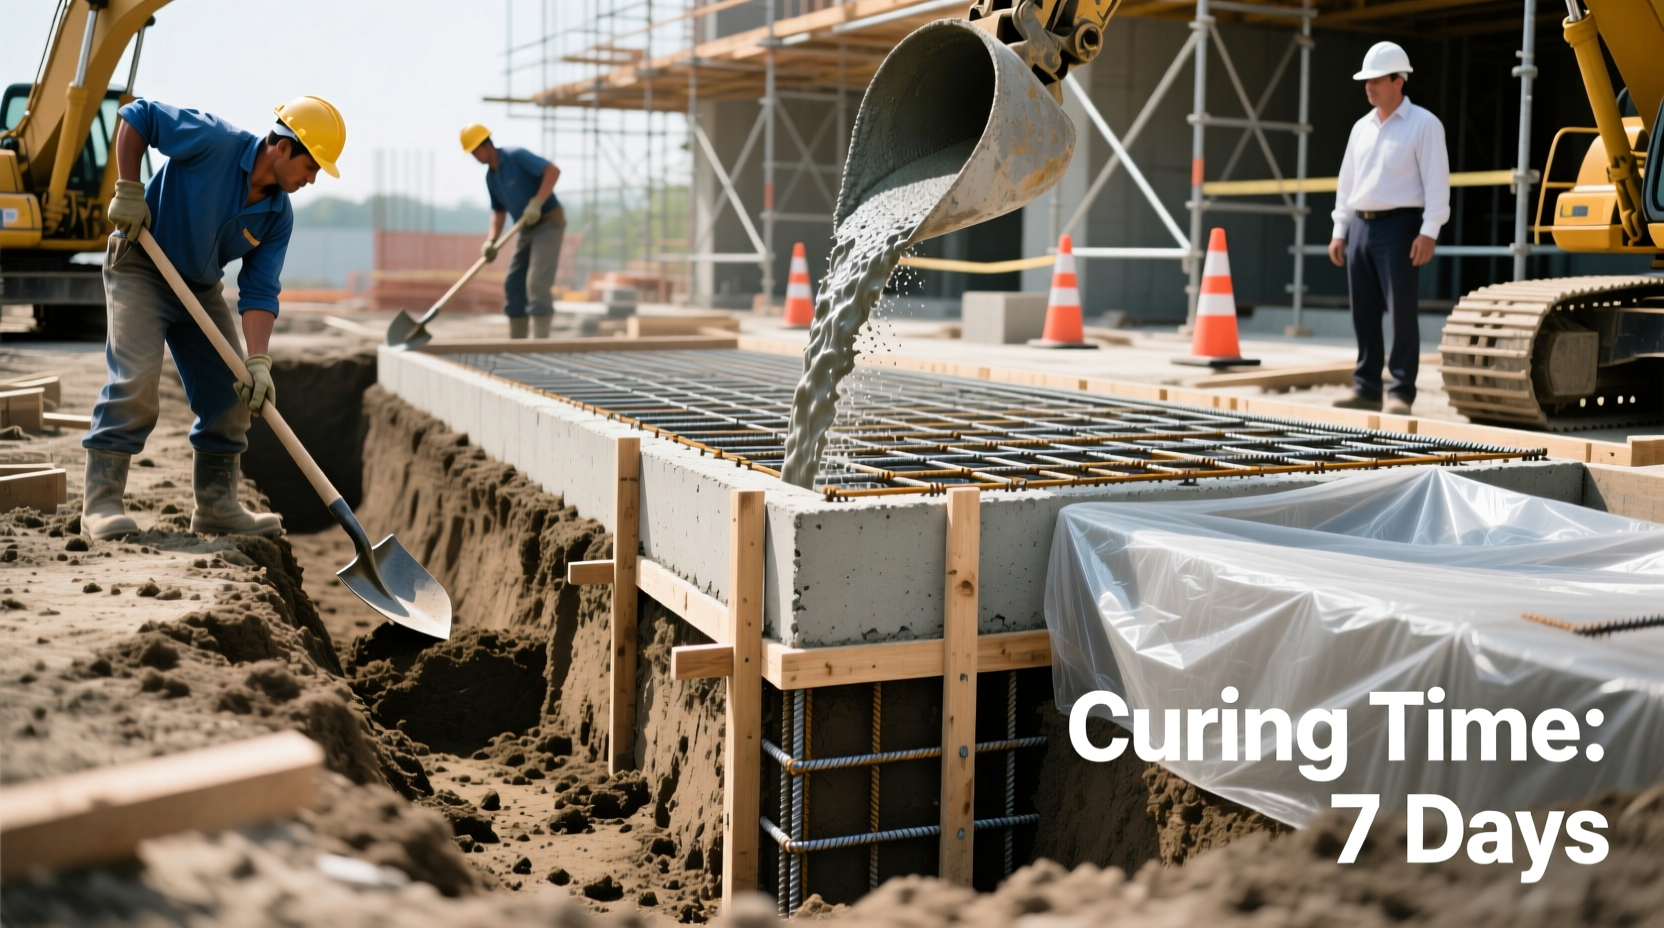
- Excavate Trenches: Dig trenches to specified width and depth. For a standard 16” wide wall, footings are typically 24”–32” wide. Slope sides slightly if soil is unstable.
- Compact the Base: Use a hand tamper or plate compactor to firm the bottom soil. Add 2–4 inches of gravel if drainage is poor.
- Install Formwork (if needed): Wooden or metal forms keep wet concrete contained. Brace them securely to resist outward pressure.
- Set Rebar: Place steel reinforcing bars according to code. Common configurations include two #4 bars continuous with dowels extending up into the foundation wall.
- Pour Concrete: Use a minimum 3,000 psi concrete mix. Pour in one continuous operation when possible to avoid cold joints.
- Screed and Finish: Level the top with a screed board. Avoid overworking the surface—just smooth enough to shed water.
- Cure Properly: Cover with plastic sheeting and let cure for at least 7 days. Rapid drying weakens concrete significantly.
For pier footings, use cardboard sonotubes cut to length and set in holes. Ensure they extend above grade to prevent moisture wicking.
Common Mistakes and How to Avoid Them
Even experienced builders make errors that compromise footing integrity. Below is a comparison of recommended practices versus frequent missteps.
| Do’s | Don’ts |
|---|---|
| Dig below frost line | Shallow footings in freezing climates |
| Use rebar where required | Relying on concrete alone without reinforcement |
| Compact subsoil thoroughly | Pouring directly on loose soil |
| Cure concrete slowly | Leaving concrete exposed to sun/wind immediately |
| Inspect before pouring | Bypassing municipal or third-party inspection |
Real-World Example: Building a Garage Foundation in Clay Soil
In central Ohio, a homeowner built a detached garage on expansive clay soil. Initial plans called for 12-inch-deep footings, but a soils report revealed high shrink-swell potential. Following an engineer’s recommendation, the contractor increased depth to 48 inches and widened footings to 36 inches. They added a 6-inch gravel base and installed perforated drain tiles around the perimeter connected to a daylight outlet.
The extra investment prevented future uplift during dry seasons. Five years later, the slab remains crack-free despite significant seasonal moisture variation—a testament to proactive footing design.
Checklist: Key Steps Before Pouring Footings
Use this checklist to ensure nothing is overlooked:
- ✅ Verified local building code requirements
- ✅ Marked property lines and obtained permits
- ✅ Called 811 for utility locates
- ✅ Excavated to correct depth and width
- ✅ Compacted base and added gravel layer (if needed)
- ✅ Installed and braced forms accurately
- ✅ Placed rebar with proper cover (at least 3 inches from edges)
- ✅ Scheduled inspection before pouring
- ✅ Confirmed concrete delivery timing and mix strength
- ✅ Prepared curing materials (plastic sheeting, water source)
Frequently Asked Questions
How deep should footings be?
Depth depends on frost line and soil type. In most of the U.S., footings must be at least 12–48 inches below grade. Always check local codes—some areas require engineering reports for structures over a certain size.
Can I pour footings in winter?
Yes, but with precautions. Ground must be thawed before excavation. Concrete must be protected from freezing during the first 48 hours using insulated blankets or heated enclosures. Use a low-slump, air-entrained mix designed for cold weather.
Is rebar always necessary?
Not always for light structures like garden sheds, but it is required by code for homes, garages, and any load-bearing walls. Rebar increases tensile strength and helps control cracking due to temperature changes and settling.
Final Considerations and Long-Term Protection
Strong footings are just the beginning. To protect your investment long-term, integrate proper drainage solutions. Install footing drains wrapped in filter fabric and slope them away from the structure. Backfill with coarse gravel to encourage water movement away from the foundation.
Vapor barriers and dampproofing on foundation walls further reduce moisture intrusion. These details work in tandem with solid footings to create a resilient base capable of lasting decades.
“The foundation is silent, but everything else depends on its strength.” — Robert Madsen, Structural Engineer with 30+ years in residential design
Take Action Today for a Stable Tomorrow
Building strong footings isn't complicated—but it demands attention to detail, adherence to code, and respect for natural forces like frost and soil movement. By following this guide, you’re not just pouring concrete; you’re laying the literal groundwork for safety, stability, and longevity.
Whether you're a DIYer tackling a small project or coordinating with contractors on a major build, insist on quality at the footing level. Inspect, reinforce, and cure properly. Your structure will stand taller and last longer because of it.


 浙公网安备
33010002000092号
浙公网安备
33010002000092号 浙B2-20120091-4
Comments
No comments yet. Why don't you start the discussion?